> ## Documentation Index
> Fetch the complete documentation index at: https://support.amplify.xyz/llms.txt
> Use this file to discover all available pages before exploring further.
# SWA App integrations
A SWA app integration provides **Single Sign-On (SSO)** to external applications that don't support proprietary federated sign-on methods. SWA works with any web-based application.
After you successfully create your SWA integration and assign it, end users can click the tile in their dashboard to launch your app. The username and password fields are populated, and the user signs in to the app automatically.
***
## Setup SWA App
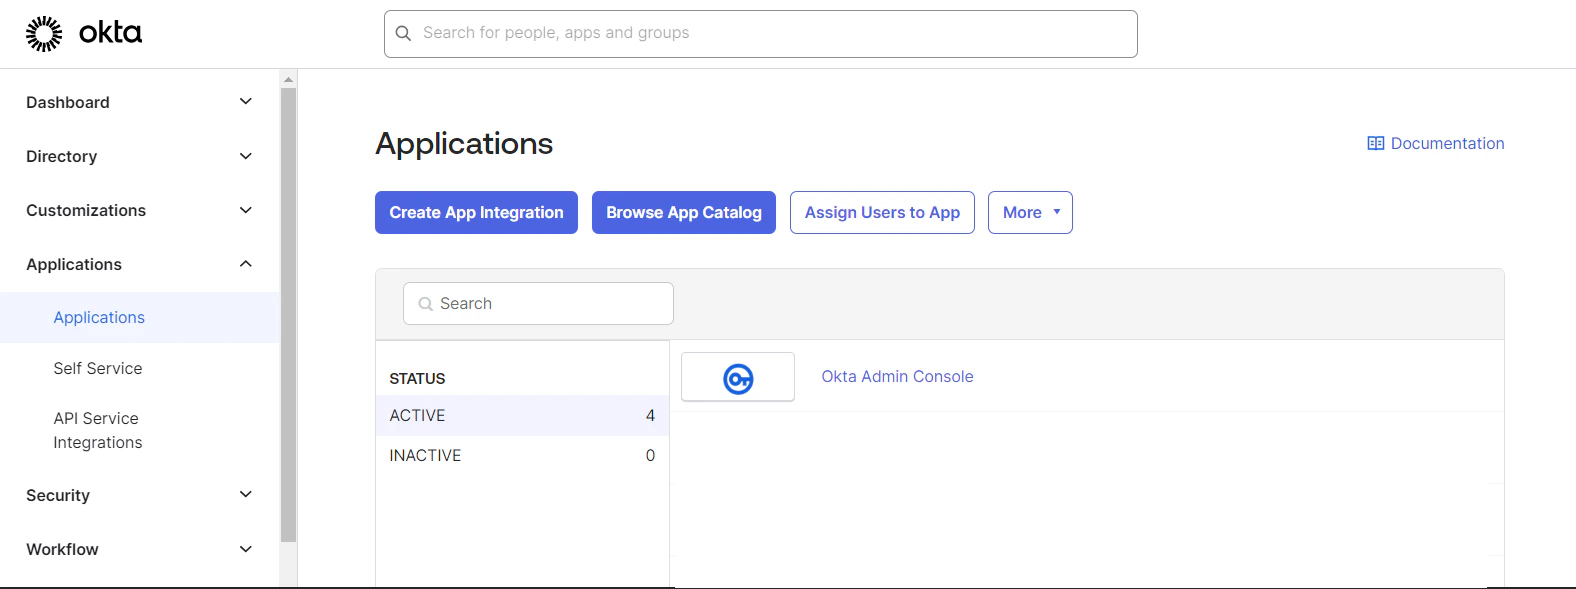
Go to **Application > Create App Integration**.
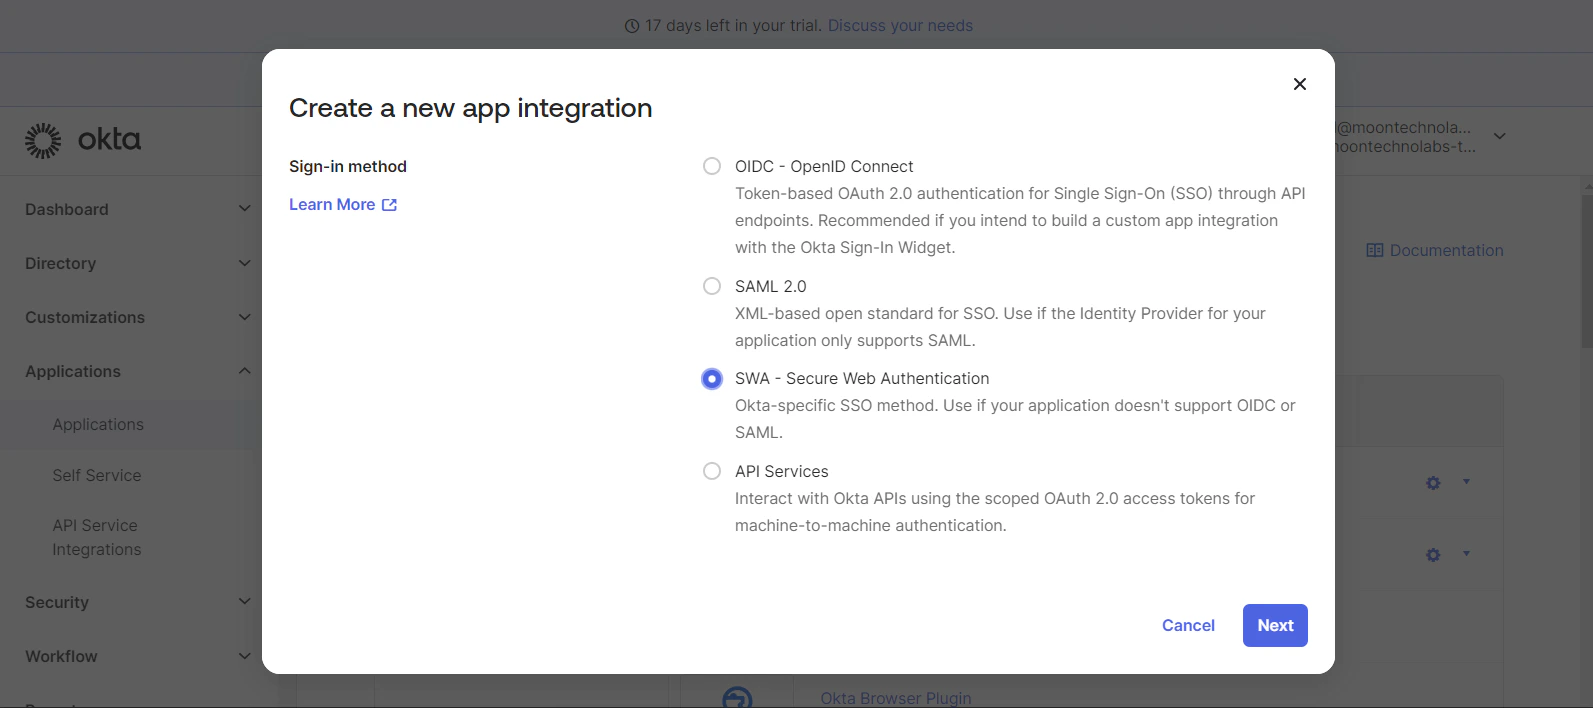
 Select **app type as SWA**.
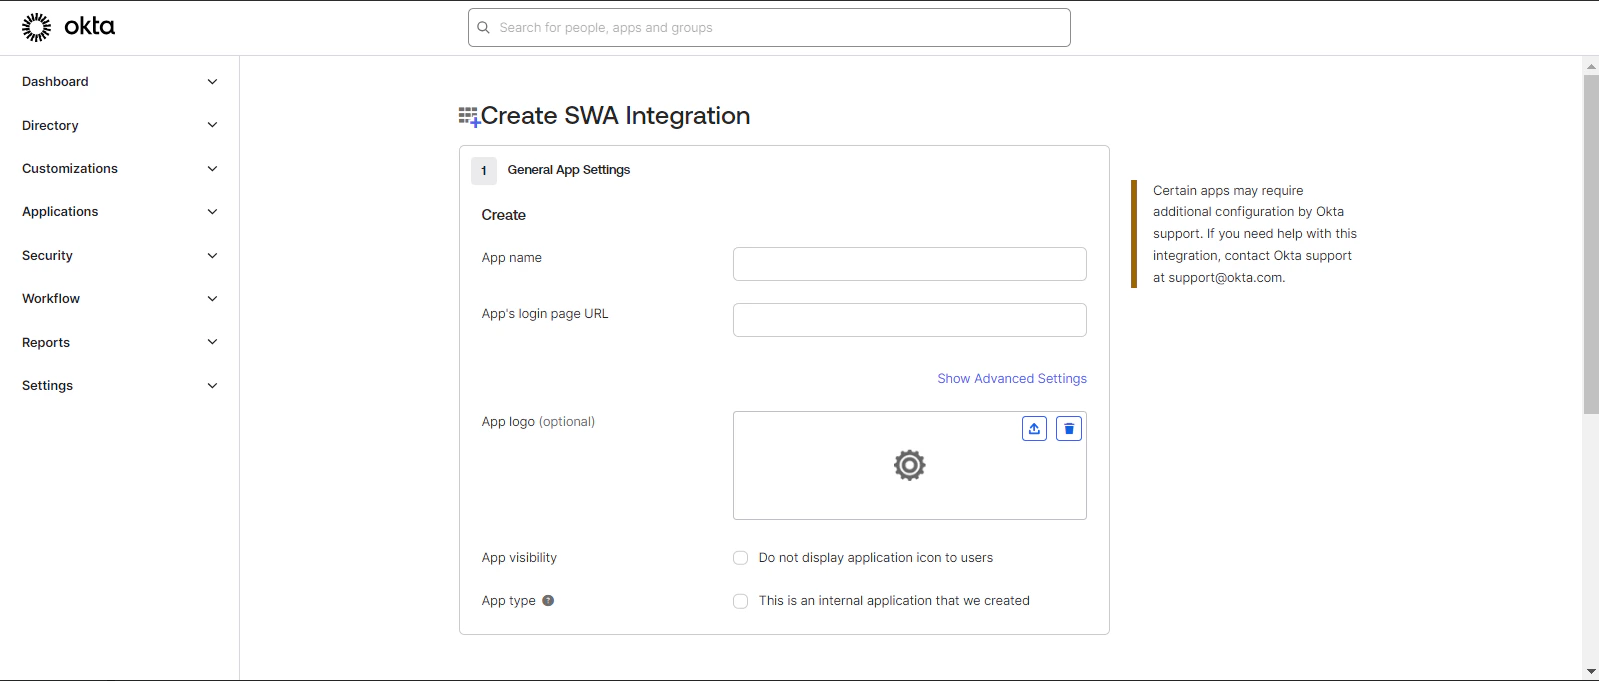
 Provide details for **General Settings**:
**App Name:** Your app name\
**App's login page URL:** [https://ifaxapp.com/login/](https://ifaxapp.com/login/)
Provide details for **General Settings**:
**App Name:** Your app name\
**App's login page URL:** [https://ifaxapp.com/login/](https://ifaxapp.com/login/)
 Once the app is saved, you need to change the **app type to SCIM**.
***
## Setup Provisioning
You can set up provisioning for the app with the following steps:
Go to **Provisioning > Integration** and click **Edit**.
### Manage SCIM Connection
**SCIM connector base URL:** [https://www.ifaxapp.com/live/Oktawebhook/index\\\\](https://www.ifaxapp.com/live/Oktawebhook/index\\\\) **Unique identifier field for users:** userName\
**Supported provisioning actions:**
Once the app is saved, you need to change the **app type to SCIM**.
***
## Setup Provisioning
You can set up provisioning for the app with the following steps:
Go to **Provisioning > Integration** and click **Edit**.
### Manage SCIM Connection
**SCIM connector base URL:** [https://www.ifaxapp.com/live/Oktawebhook/index\\\\](https://www.ifaxapp.com/live/Oktawebhook/index\\\\) **Unique identifier field for users:** userName\
**Supported provisioning actions:**
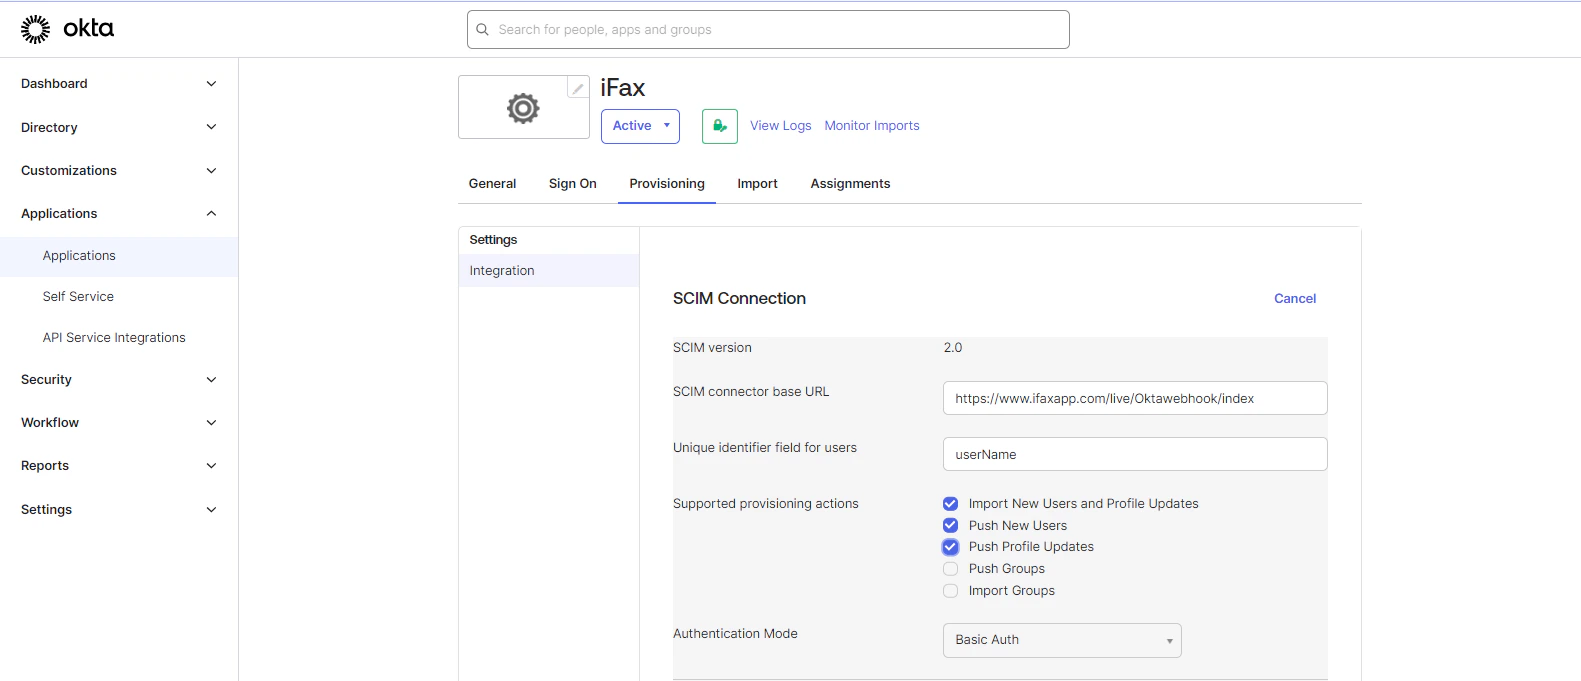 \
Import New Users and Profile Updates, Push New Users, Push Profile Updates
Select **Authentication Mode:** Basic Auth
You need to add **Amplify credentials**.
**Username:** Amplify Email\
**Password:** Amplify Password
\
Import New Users and Profile Updates, Push New Users, Push Profile Updates
Select **Authentication Mode:** Basic Auth
You need to add **Amplify credentials**.
**Username:** Amplify Email\
**Password:** Amplify Password
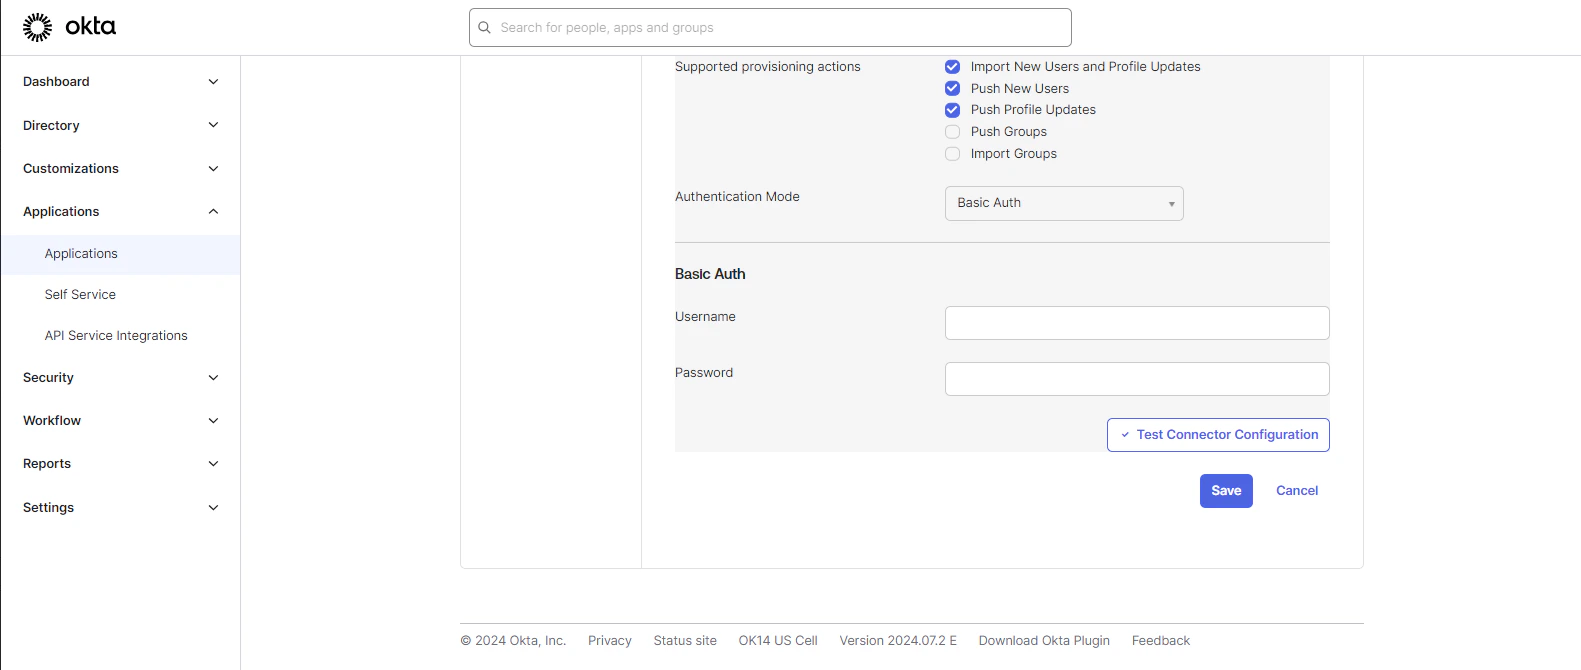 Be sure to test the connector configuration before saving.
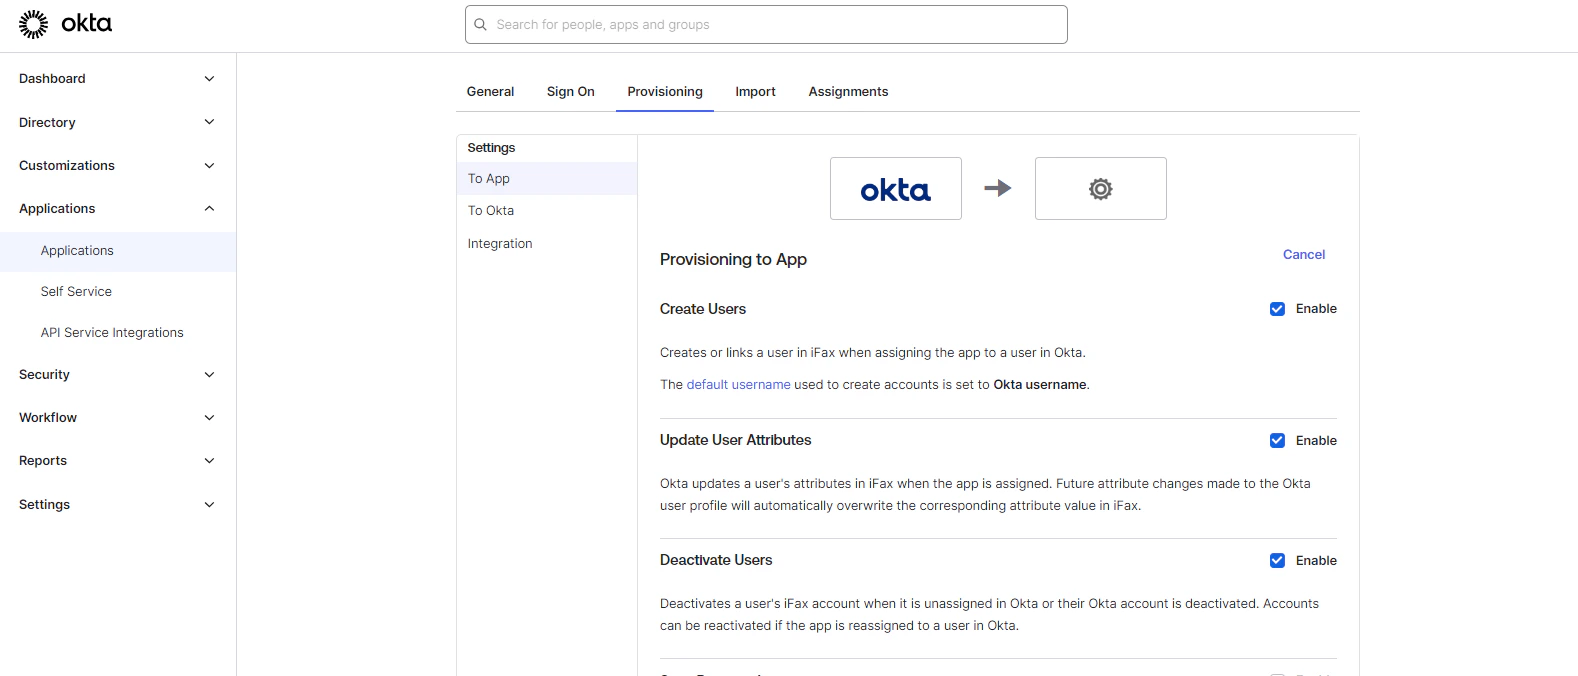
Go to **Provisioning > To App**
Enable the following **Provisioning to App** options:
Create Users\
Update User Attributes\
Deactivate Users
Be sure to test the connector configuration before saving.
Go to **Provisioning > To App**
Enable the following **Provisioning to App** options:
Create Users\
Update User Attributes\
Deactivate Users
 ***
## Add Attribute for Permission
To add a custom attribute for permission, follow these steps:
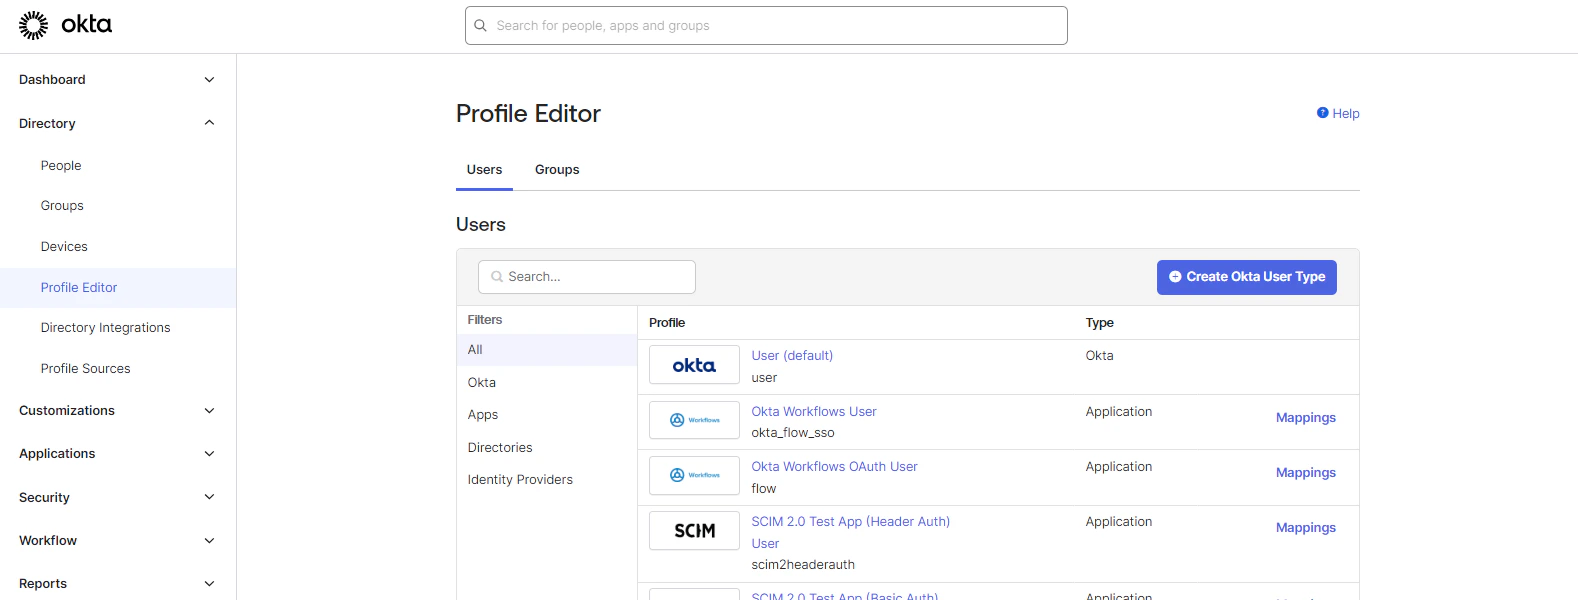
Go to **Profile Editor**
Search for your app.
***
## Add Attribute for Permission
To add a custom attribute for permission, follow these steps:
Go to **Profile Editor**
Search for your app.
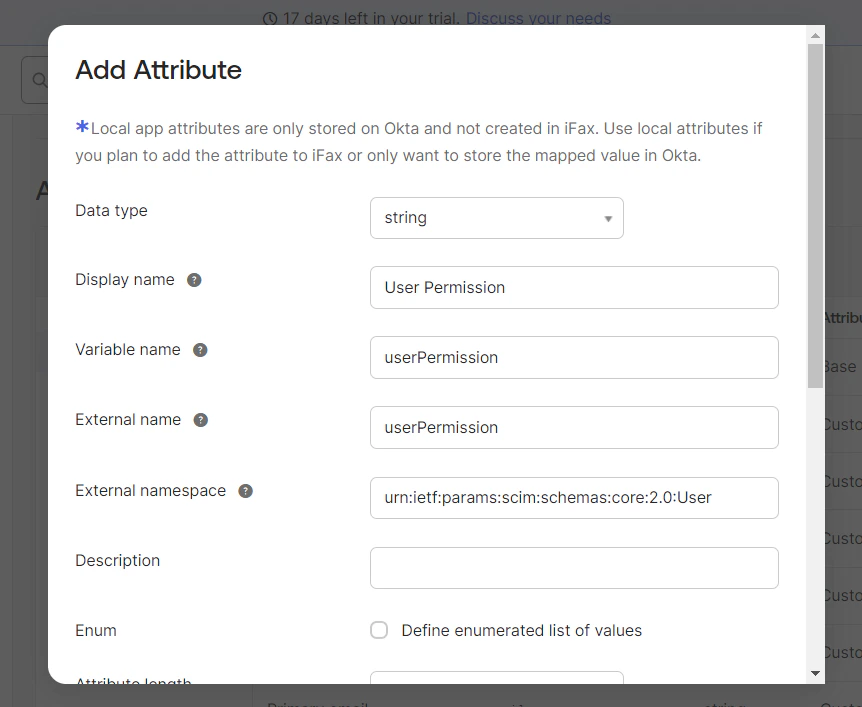
 Go to **Attributes** and add a **New Attribute**.
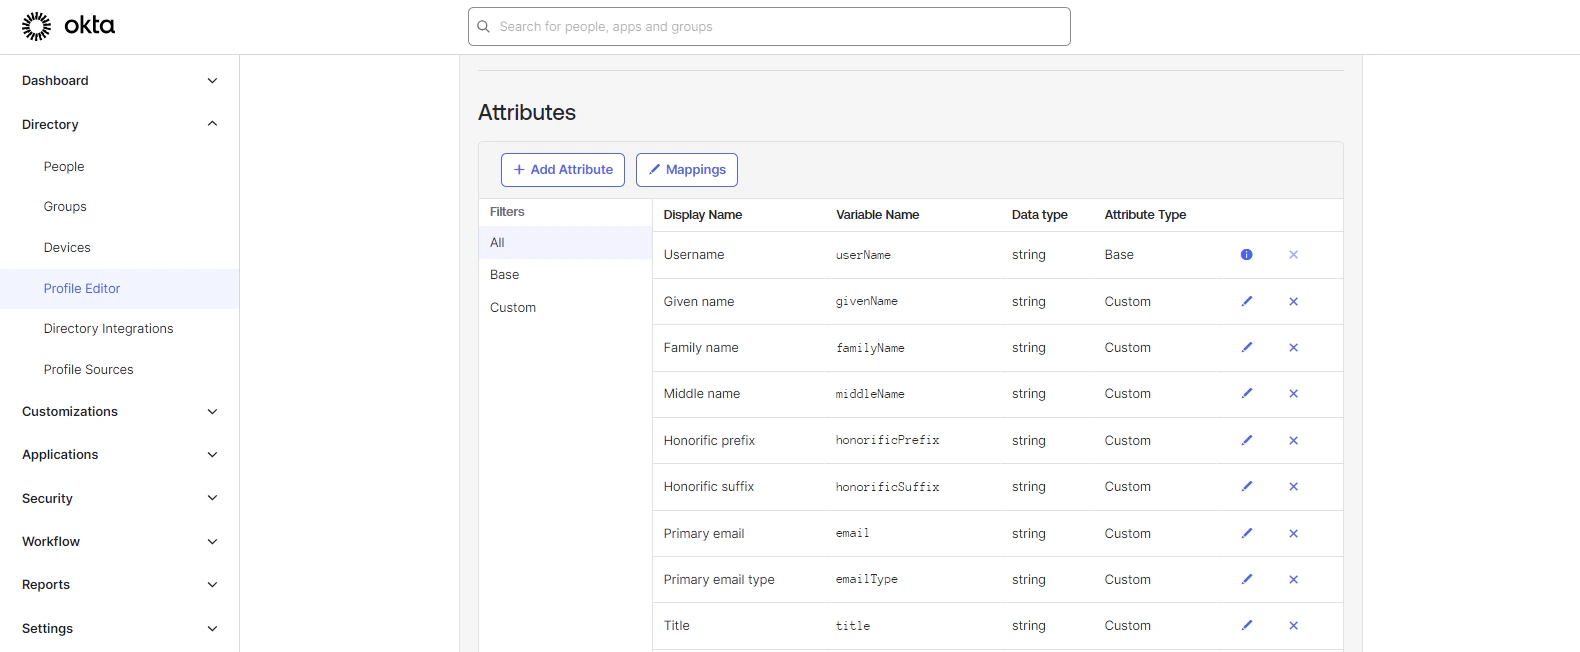 For **Custom Attributes**, set the following parameters:
**Data Type:** String\
**Display Name:** User Permission\
**Variable Name:** userPermission\
**External Name:** userPermission\
**External Namespace:** urn:ietf:params:scim:schemas:core:2.0:User
For **Custom Attributes**, set the following parameters:
**Data Type:** String\
**Display Name:** User Permission\
**Variable Name:** userPermission\
**External Name:** userPermission\
**External Namespace:** urn:ietf:params:scim:schemas:core:2.0:User
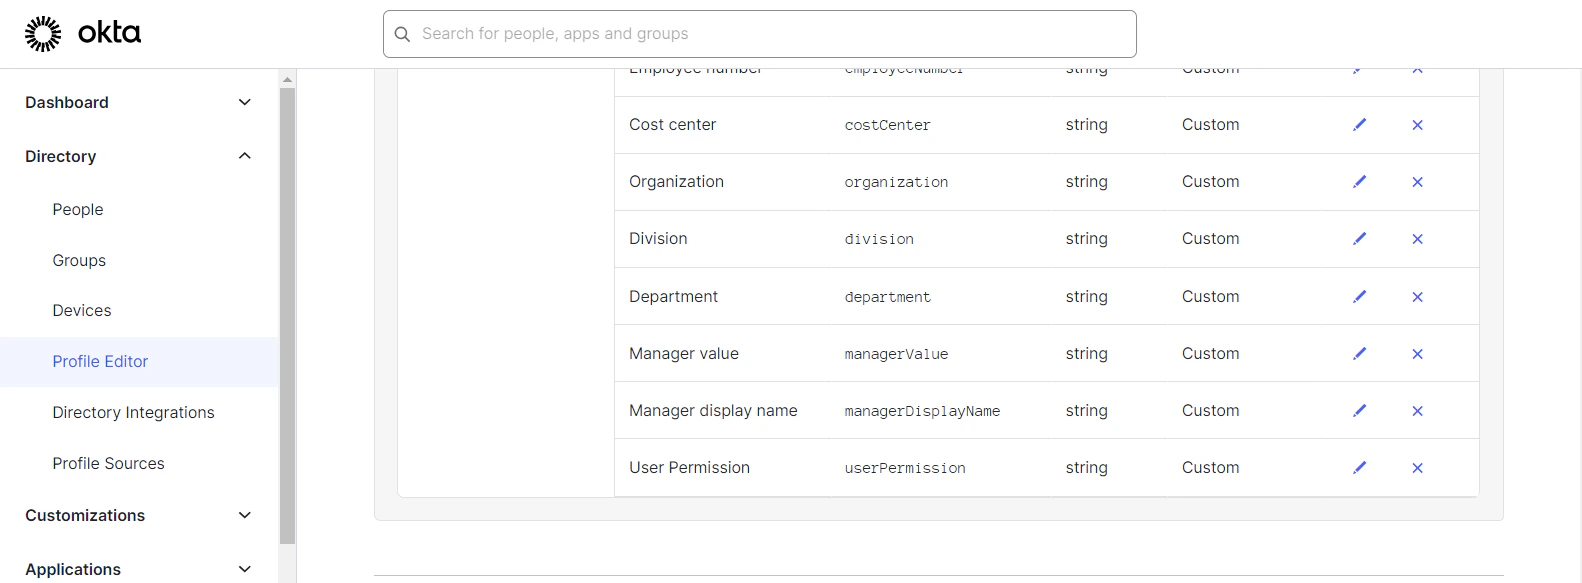
 Here you can see the attribute added.
 ***
## Assign Or Delete User
To add a user, follow these steps:
Go to **People > Add Person**
***
## Assign Or Delete User
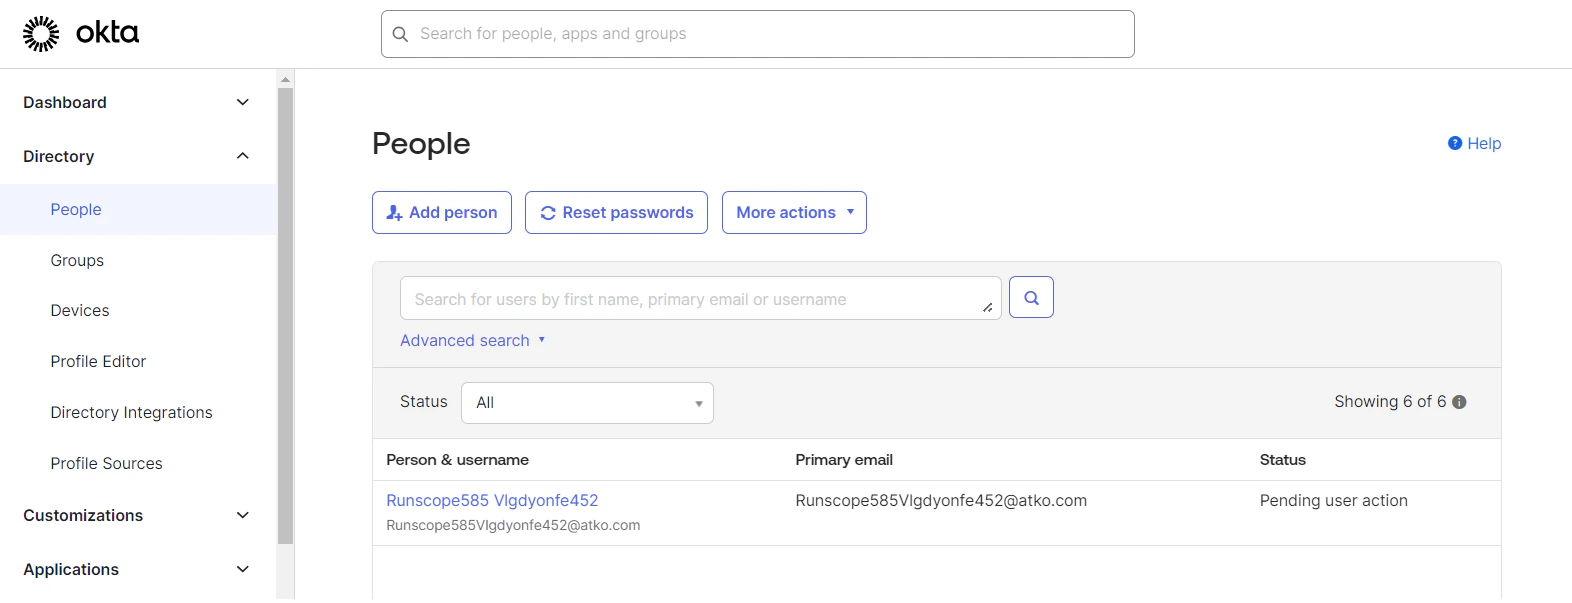
To add a user, follow these steps:
Go to **People > Add Person**
 Go to **Application > Assign > Assign People**
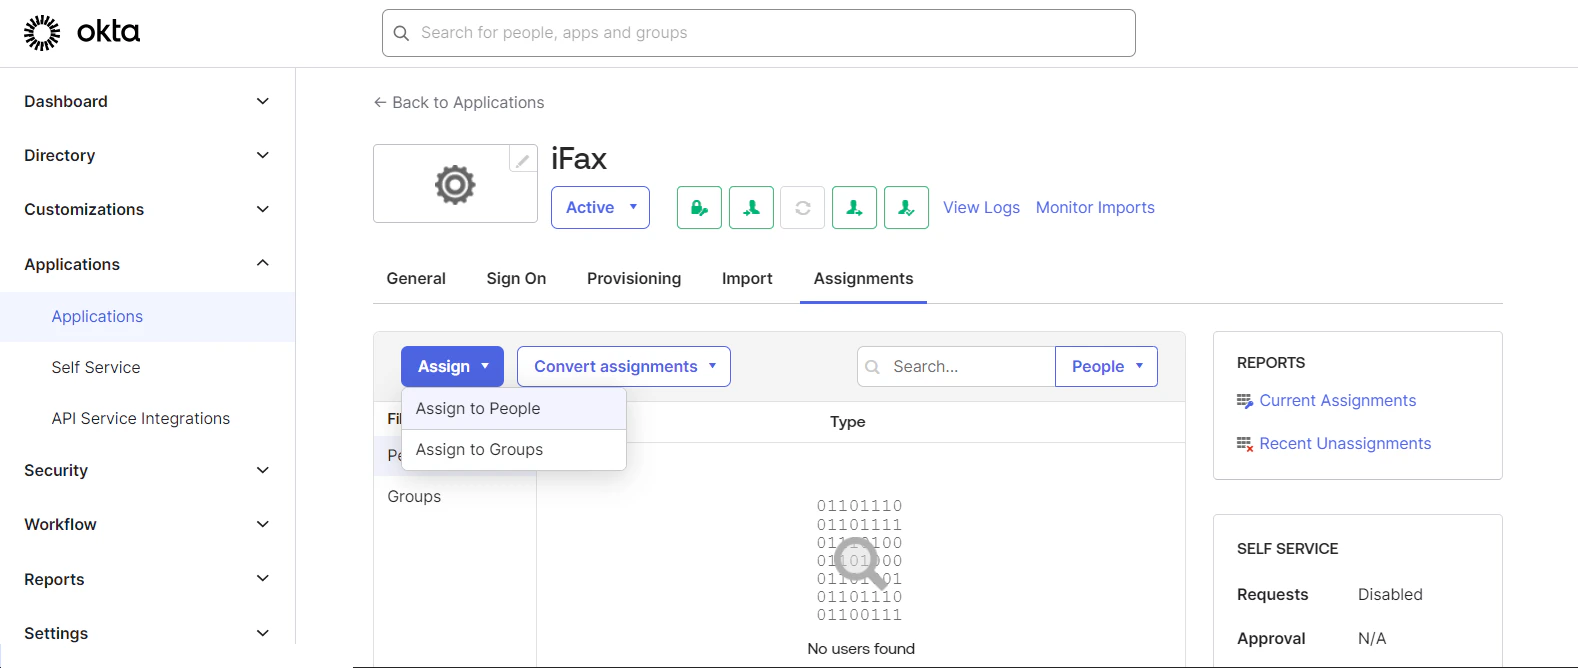 Select **People to assign the App**
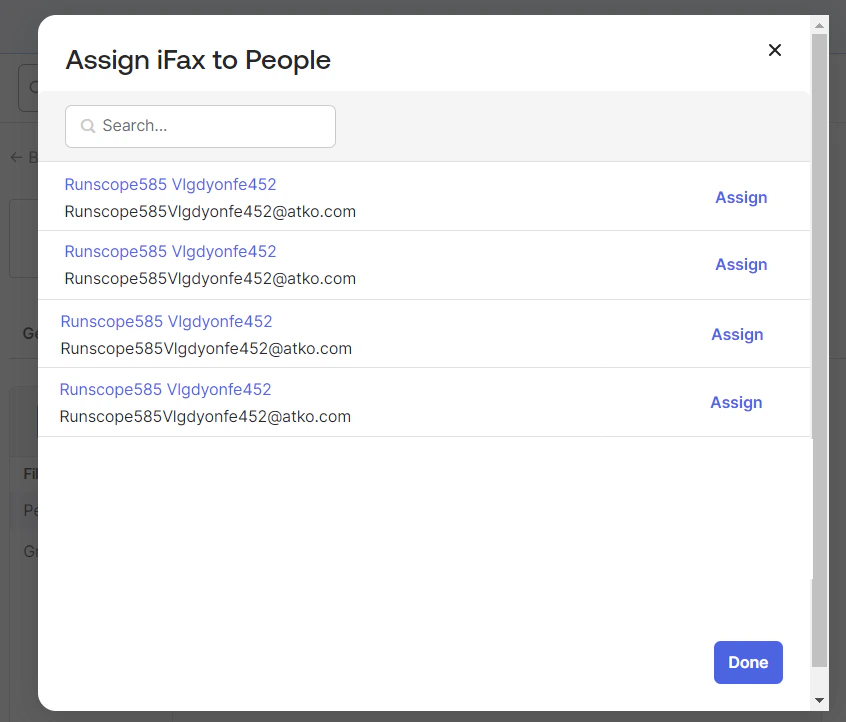 Add the custom permission in **User Permission**. This will be a **group name**, and that group name should exist in iFax.
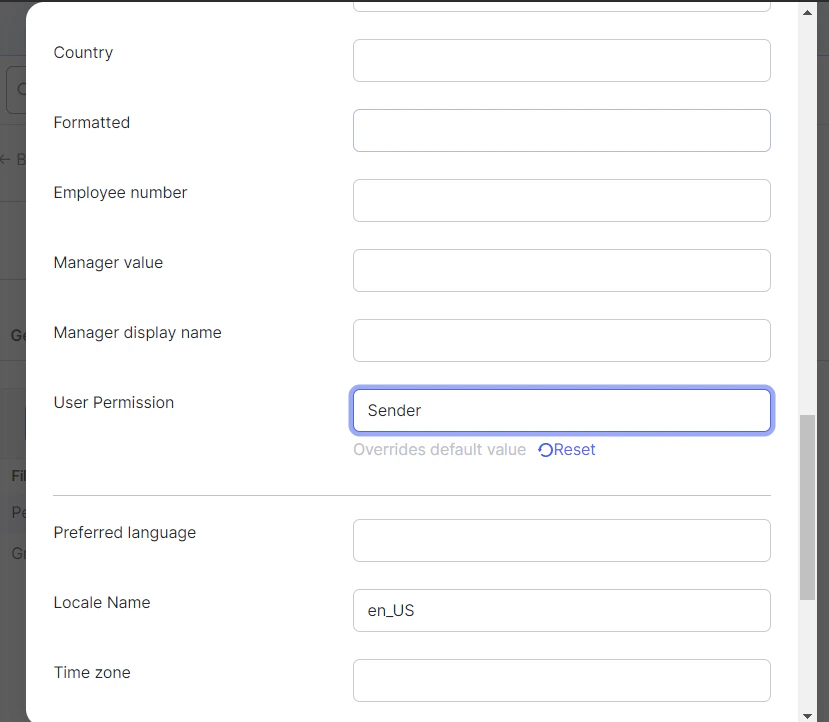 \
All permissions will be assigned to the user based on this group.
***
## To Delete User
To delete a user, follow these steps:
Go to **Application > People**
Delete the specific user from here.
\
All permissions will be assigned to the user based on this group.
***
## To Delete User
To delete a user, follow these steps:
Go to **Application > People**
Delete the specific user from here.